Documentation
Game objects
A game made on Talefab.com has a basic structure like this:
- Models
- Rooms
- Including Items (model instances)
- Scenes
- Including Characters (model instances)
- Including Dialogues
Notice the bolded words? Those are the main components of a game, and the most important ones are Models, Rooms and Scenes. Let’s see them in details:
Model
Models are the main building blocks of your game. They act as blueprints, and can be used and reused in different rooms and scenes.
To add a model, follow the steps below:
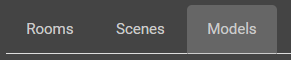
- Press the “Models” tab in the upper-left corner
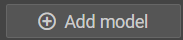
- Press “+ Add model” button in the left panel
- Fill the “Name” in the middle panel.
Model States
A visual representation of a model is called a State. A model can have many states (many visual representations), which can be switched during gameplay.
States of a model can represent various things: character expressions, state of an object, perspective views, music, etc.
For example a door can have a “Closed” and an “Opened” state.
To add a state to a model, follow the steps below:
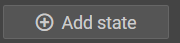
- Press “+ Add state” button in the middle panel
- Upload an image:
- Image formats: JPG, JPEG, PNG, GIF
- File size must be less then 5 MB
| Field | Type | Mandatory | Description |
| ID | - | - | This ID will define the state. However, this ID will not be used as a reference! |
| Name | Text | Yes | The name of the state. Ex: “Closed” |
| File | File | Yes | The visual representation of the state or a music file. Formats: JPG, JPEG, PNG, GIF, MP3, WAV |
| Width | Number | Yes | Width of the image, in pixels |
| Height | Number | Yes | Height of the image, in pixels |
| Default state | Checkbox | - | The state with “Default state” checked will be set as default, when an item is instantiated. |
Model Options
Options ads interactivity to an item. For example a door can “Go to a room” called House.
A model can have multiple options, each of them having a specific Action – defining what should happen when the player clicks on the option.
To add an option to a model, follow the steps below:
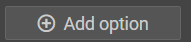
- Press “+ Add option” button in the middle panel
- Select an action from the “Action” dropdown (ex. “Go to room”)
| Field | Type | Mandatory | Description |
| ID | - | - | This ID will define the state. However, this ID will not be used as a reference! |
| Action | Dropdown | Yes | Define what happens when the option is clicked |
| Value | Number or text | No | Most of the time contains an ID of a game object. It’s not mandatory, and often is defined at the item. |
| New state | Number or text | No | It’s used when an item’s state must be changed regardless of the Action. |
Available actions and values:
| Action | Value | Description |
| Go to room | Room ID | Redirects the player in a room. |
| Play scene | Scene ID | Play a scene. |
| Show text | Text | Shows a dialogue styled text. |
| Receive item | Item ID | An item is put in the inventory. The item must be placed in one of the rooms already visited to be receivable. If needed, the Visibility can be set to 'Invisible - no interactions' to entirely hide it. |
| Use item | Item ID | Deletes an item from the inventory. |
| Add item | ChildItemID :: ParentItemID | Attaches an item (child) to another item (parent). If Value is blank, any item can be attached to this item. |
| Change state to | State ID (for this item) | Changes one or more item's state. If you specify only a state ID, it refers to this item. You can specify both the item's ID and the item's state ID in the Value field. |
| External link | Valid URL | Opens an external URL in a separate tab. |
| Type and Test | TrueValue :: TextIfTrue :: TextIfFalse | Opens an input dialogue box. On submit, the introduced value is tested against TrueValue. If it's matched, TextIfTrue is displayed, else TextIsFalse is displayed. |
Room
Rooms are containers with a background. They represent the backbone of a game. A room contains instances of models, called items.
To add a room, follow the steps below:
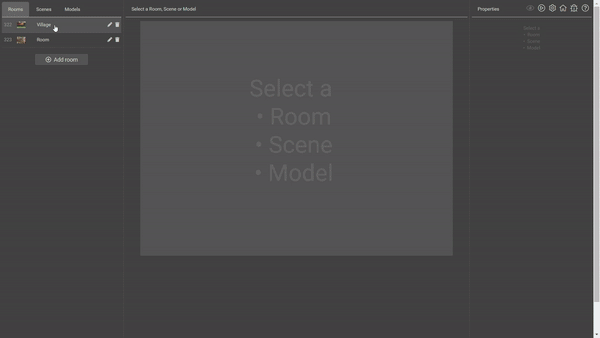
- Press the “Rooms” tab in the upper-left corner
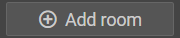
- Add a room by pressing the “+ Add room” button in the left panel
- Fill the “Name” in the right panel.
- Upload a background (image or video)
| Field | Type | Mandatory | Description |
| ID | - | - | This ID will define the room. It is used in Value fields. |
| Name | Text | Yes | Name of the room. |
| Background | File | Yes | Image formats: JPG, JPEG, PNG, GIF Video formats: VMW, MPG, MPEG, MP4, AVI, MOV File size must be less then 5 MB Dimension should be 800 x 600 pixel. |
| X offset | Number | No | The horizontal offset of the background image. Can be used for images wider than the canvas. |
| Music ID | ID | No | Item ID of a Music model. If the previously visited room's Music ID was the same, the music will continue to play. |
Item
Dragging a model into a room creates an instance of that model, called an item. Items have the same properties as their parent model.
Steps to create an item:
- Go to the “Rooms” tab and select a room
- Go to the “Models” and drag a model from the list to the middle panel, over the visual editor.
| Field | Type | Mandatory | Description |
| ID | - | - | This ID will define the item. |
| Name | Text | Yes | Name of the item. |
| X | Number | Yes | The horizontal position of the item in pixels. |
| Y | Number | Yes | The vertical position of the item in pixels. |
| Visibility | Dropdown | - | Visible - the item is fully visible and clickable Invisible - interactive - the item invisible but it is still clickable. Invisible - no interactions - the item invisible and it's not clickable. |
| Stackable
| Checkbox | - | Check this if the item is stackable in the inventory. |
| Defaul state | Dropdow | - | The item will appear with this state by default in the room. |
Item States
The states of an item are copied when the item is instantiated. The created item’s states has the same properties and values as the parent model’s states.
The list of fields can be found here.
Item Options
The options of an item are copied when the item is instantiated. The created item’s options has the same properties and values as the parent model’s states.
The list of fields can be found here.
NOTE: State IDs and Option IDs referenced in Value field must be an item’s state IDs and option IDs. Do not use model state IDs and Option IDs!
In addition to model’s option, an item’s option can be conditioned. If an option’s condition is met, the option will be available, when the player clicks the item.
For more info, check the documentation of condition formatting.
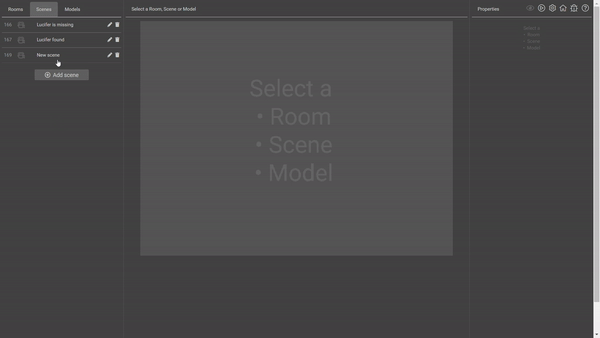
Scene
Scenes are sets of dialogues between one or more characters. They add storyline to a game.
Steps to create a scene:
- Press the “Scenes” tab in the upper-left corner
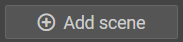
- Press “+ Add scene” button in the left panel
- Fill the “Name” in the middle panel.
| Field | Type | Mandatory | Description |
| ID | - | - | This ID will define the scene. |
| Name | Text | Yes | Name of the scene. |
| Play condition | Text | No | If this condition is met, the scene is played in an instant. Check the documentation of condition formatting. |
| Transition | Dropdown | - | Transitional effect of the dialogues. |
Character
A character is a simple model, which is dragged to a scene for instantiating.
States of a character represents poses, expressions. A character model often does not have any options (since it can’t be clicked by the player).
Steps to create a character:
- Go to the “Scenes” tab and select a scene
- Go to the “Models” and drag a model from the list to the middle panel, over the “Drag a model” box.
Dialogue
A scene consists of multiple dialogues. The player will loop through the dialogues of a scene until it reaches it's end, or the current dialogue has at least one option.
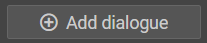
Steps to create a dialogue:
- Press the “Scenes” tab in the upper-left corner
- Press “+ Add dialogue” button in the middle panel
- Select the Character from the “Character”dropdown
- Select the state / expression from the “State” dropdown
- Fill the X and Y values, this represents the position of the character on the canvas.
- Write the dialogue in the “Dialogue” text area.
| Field | Type | Mandatory | Description |
| ID | - | - | This ID will define the dialogue. |
| Character | Dropdown | Yes | The character who says the dialogue |
| State | Dropdown | Yes | The state of the character when the dialogue is shown |
| X | Number | Yes | The horizontal position of the character in pixels. |
| Y | Number | Yes | The vertical position of the character in pixels. |
| Hidden | Checkbox | - | If this is checked, the dialogue will not be shown when looping through the scene. |
| Dialogue
| Text | Yes | The text of the dialogue. Break lines are allowed, HTML entities or BBcodes are not allowed. |
In addition, you have the following buttons / functionalities in the right side of a dialogue:
- Up / Down arrow – for sorting the dialogues
- View (eye icon) – you can view the dialogue as it will be shown to the player
- Delete (trash icon) – delete a dialogue
Dialogue Option
Options of a dialogue allows the player to choose from different outcomes / actions. It works the same way as an item’s option.
If a dialogue has at least one option, the scene loop will stop. In this case the player must chose an option, and this will define what will happen next.
To add an option to a dialogue, follow the steps below:
- Press “+ Add option” button in the middle panel, below a dialogue
- Fill the “Text” field, this will be the option’s displayed text.
- Select an action from the “Action” dropdown (ex. “Go to room”)
- Fill the “Value” field with the appropriate value.
| Field | Type | Mandatory | Description |
| Text | Text | Yes | The option’s displayed text. |
| Action | Dropdown | Yes | Defines what happens when the option is clicked |
| Value | Number or text | No | Most of the time contains an ID of a game object. |
Available actions and values:
| Action | Value | Description |
| Go to room | Room ID | Redirects the player in a room. |
| Play scene | Scene ID | Play a scene. |
| Play dialogue | Dialogue ID | Jumps to a dialogue within this scene. |
| Receive item | Item ID | An item is put in the inventory. The item must be placed in one of the rooms already visited to be receivable. If needed, the Visibility can be set to 'Invisible - no interactions' to entirely hide it. |
| Use item | Item ID | Deletes an item from the inventory. |
| Change state to | State ID (for this item) ItemID:StateID (for other item) | Changes one or more item's state. If you specify only a state ID, it refers to this item. You can specify both the item's ID and the item's state ID in the Value field. |
| External link | Valid URL | Opens an external URL in a separate tab. |
| Type and Test | TrueValue :: TextIfTrue :: TextIfFalse | Opens an input dialogue box. On submit, the introduced value is tested against TrueValue. If it's matched, TextIfTrue is displayed, else TextIsFalse is displayed. |